


Essential Supplies and Prep for Amber Restoration
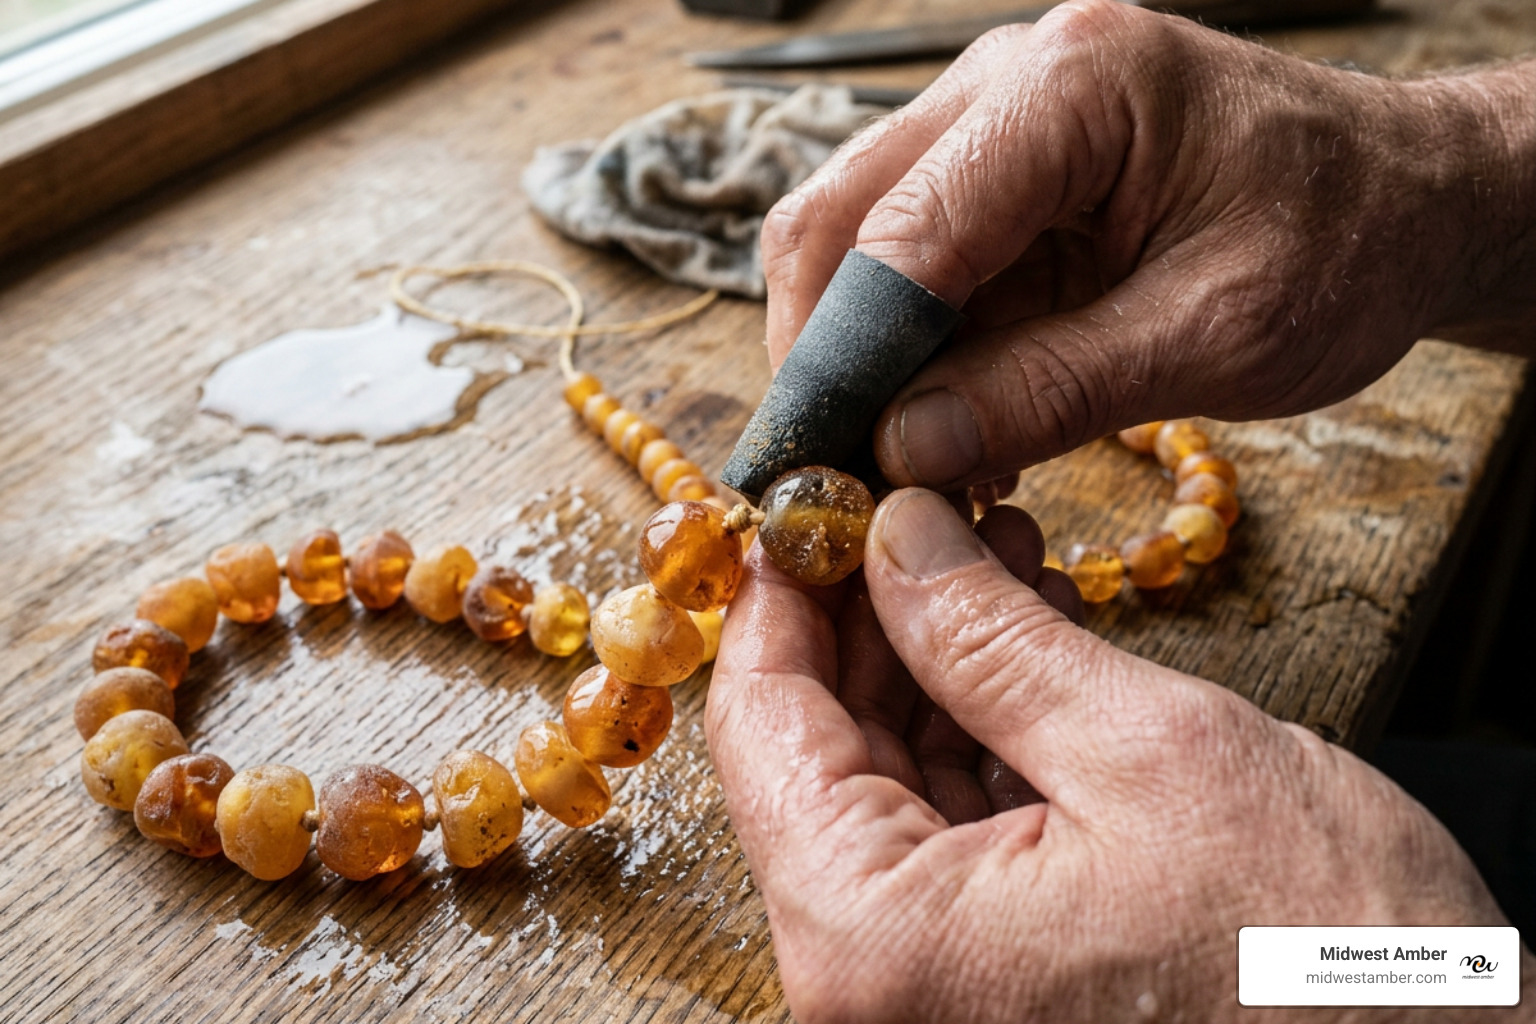
To polish amber jewelry safely at home, clean the piece in mild soapy water, wet-sand micro-scratches using ultra-fine waterproof sandpaper (1000 to 3000 grit), buff away cloudiness with a gentle cerium oxide paste, condition the resin with a drop of olive oil, and hand-buff with a soft flannel cloth to achieve a radiant mirror luster. Because natural Baltic amber ranks at only 2 to 2.5 on the Mohs scale, harsh mineral abrasives and high-speed rotary tools will permanently gouge or crack this delicate fossilized resin.
To polish your jewelry safely at home, assemble these non-abrasive, workshop-tested supplies:
- Microfiber cloths and cotton flannel: For streak-free cleaning, applying polishing pastes, and final buffing.
- Lukewarm water and mild, pH-neutral soap: A gentle liquid dish soap or castile soap free from fragrances, alcohol, or harsh detergents.
- Ultra-fine waterproof sandpapers (1000, 2000, and 3000 grit): Silicon carbide wet/dry sheets that soften with water soaking.
- Flexible foam pad or soft sponge: Serves as a pliable backing block for sandpaper, protecting the natural, organic contours of beads and cabochons.
- Optical-grade polishing compound: High-purity cerium oxide or aluminum oxide powder mixed into a smooth paste.
- Conditioning oil: Pure, high-grade extra virgin olive oil or mineral oil.
- Soft-bristled baby toothbrush: Helpful for gently lifting dirt around precious metal settings without abrading the gemstone.
| Material / Method | Safe for Genuine Baltic Amber? | Primary Purpose / Risk Profile |
|---|---|---|
| Warm Water & Mild Soap | Safe | Removes oils, cosmetics, and everyday surface film. |
| Wet Sandpaper (1000–3000 grit) | Safe | Removes oxidation layers and micro-scratches without creating heat. |
| Cerium Oxide Paste | Safe | Buffs out micro-abrasions to achieve optical clarity. |
| Extra Virgin Olive Oil | Safe | Rehydrates resin pores and restores visual depth. |
| Alcohol / Acetone Solvents | Unsafe | Melts fossilized resin, creating sticky white hazing. |
| Rotary Buffing Wheels | Unsafe | Builds rapid friction heat, risking warping and thermal cracks. |
| Ultrasonic Cleaners | Unsafe | Vibrational cavitation shatters internal stress fractures. |
Pre-Polishing Preparation: Safe Surface Cleaning
Before addressing physical scratches or dullness, you must remove any body oils, cosmetic buildup, and dust particles from the piece. Sanding over surface grit can grind dirt into the soft resin, creating new micro-scratches.
Begin by mixing a few drops of mild, pH-neutral soap in a bowl of lukewarm water. Never use hot water, as abrupt temperature swings can trigger internal stress cracks in delicate fossilized tree resin. Submerge your amber jewelry for no more than 30 to 60 seconds.
Using your fingertips or a soft-bristled toothbrush, gently clean around bezel settings, prongs, and bead drill holes. Rinse the piece thoroughly under a gentle stream of lukewarm running water to wash away all soap traces. Pat the piece completely dry using a lint-free microfiber towel. For ongoing maintenance tips, explore our comprehensive Amber Jewelry Care Guide 2026.
How to Polish Amber Jewelry in 5 Step-by-Step Stages
Restoring the radiant warmth of Baltic amber is a mindful, tactile process. When we work with heirloom pieces handcrafted by master artisans in Poland and Lithuania, we follow a strictly non-thermal friction process. By keeping the amber wet and using controlled hand pressure, you can effortlessly revive cloudy patinas and smooth away years of wear.
For additional step-by-step lapidary insights, you can review this guide on Diy Amber Polishing: Simple Steps To Restore Its Natural Shine At Home.
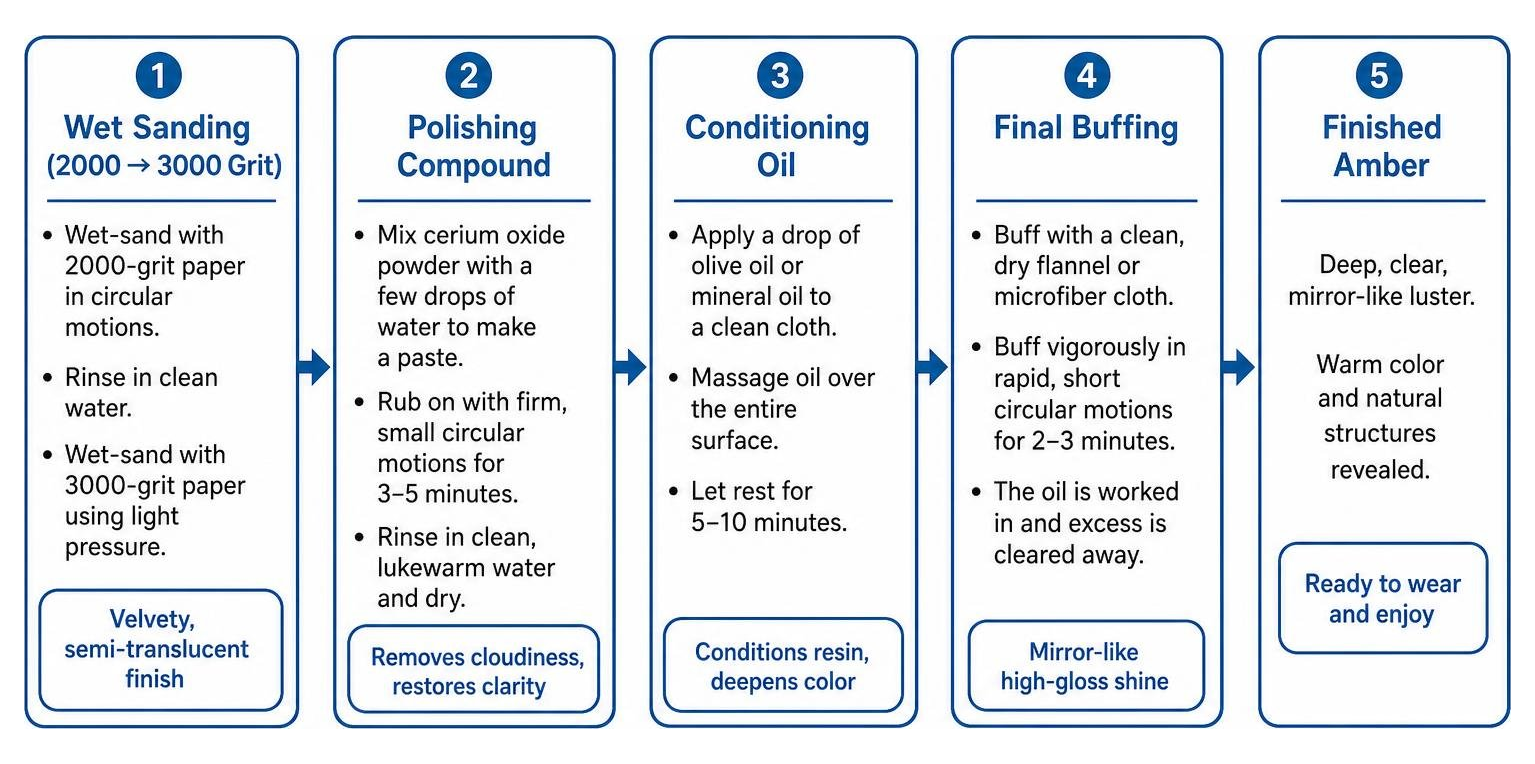
Step 1: Initial Wet-Sanding for Surface Scratches
Soak your 1000-grit waterproof sandpaper sheets in a shallow bowl of lukewarm water for at least 15 minutes before starting. Water acts as an essential lubricant and coolant, sweeping away loosened resin debris while preventing friction heat buildup.
Wrap the soaked 1000-grit paper around a small, flexible foam pad or a soft sponge. Holding your amber ring, pendant, or bead securely between your fingertips, sand the scratched area using light, linear strokes.
Always sand with light, consistent pressure rather than aggressive scrubbing. Inspect the gemstone every 15 to 20 seconds under bright light. As soon as prominent scratches and white oxidation haze disappear into a uniform, satin-matte texture, stop sanding.
Step 2: Smoothing with Ultra-Fine Sandpaper
Transitioning across finer grits refines the surface texture so it is ready for optical polishing. Submerge your 2000-grit and 3000-grit wet/dry sandpapers in water.
- Begin wet-sanding with the 2000-grit paper, using smooth, circular motions across the entire surface to eliminate the linear marks left by the 1000-grit paper.
- Rinse the amber in clean water to wash away loose particles before moving to the next grit.
- Follow with soaked 3000-grit paper, applying light pressure across the stone.
The flexible foam backing helps the paper follow the organic, hand-shaped contours of the amber without creating flat spots. You can read more about grit selection in this overview on Mastering Amber Polishing: A Sandpaper Guide For Smooth, Shiny Results.
Step 3: Removing Cloudiness with Polishing Compound
Once the stone has a velvety, semi-translucent finish, it is ready for clarifying. Optical-grade cerium oxide is the jeweler's standard for restoring high clarity to organic resins without using harsh chemicals.
Mix a pea-sized amount of cerium oxide powder with a few drops of water in a small dish to create a creamy paste. Dab the paste onto a clean microfiber pad or chamois cloth.
Rub the paste over the amber using firm, small circular motions for 3 to 5 minutes. The ultra-fine abrasive particles will gently smooth out microscopic sanding lines, revealing the internal organic structures and warm sun spangles beneath the surface. To better appreciate these unique natural characteristics, read our guide Beyond the Shine: Exploring the Essence of Natural Baltic Amber.
Rinse the amber in clean, lukewarm water to remove all compound residue, then pat it completely dry.
Step 4: Conditioning with Natural Oils
Fossilized tree resin contains natural micro-pores that benefit from light hydration after sanding. Applying an organic conditioning oil locks in moisture, deepens color saturation, and highlights the stone's warm tones.
Place a single drop of high-purity extra virgin olive oil or cosmetic mineral oil onto a clean section of flannel or cotton cloth. Gently massage the oil over the entire surface of the amber. Let the jewelry rest undisturbed for 5 to 10 minutes so the oil can condition the outer resin layer. To learn more about the unique hues of natural Baltic resin, explore From Raw to Red: A Shopper's Guide to Every Type of Amber Jewelry.
Step 5: Final Buffing for a Mirror Luster
The final stage creates the high-gloss shine characteristic of classic Baltic amber jewelry. Take a clean, dry flannel or microfiber buffing cloth and grip the stone firmly.
Buff the amber vigorously in rapid, short circular motions. This manual buffing generates mild, safe friction that works the conditioning oil into the surface and clears away any excess film. Within two to three minutes, the amber will develop a deep, mirror-like gloss.
Protecting Handcrafted Baltic Settings and Inclusions
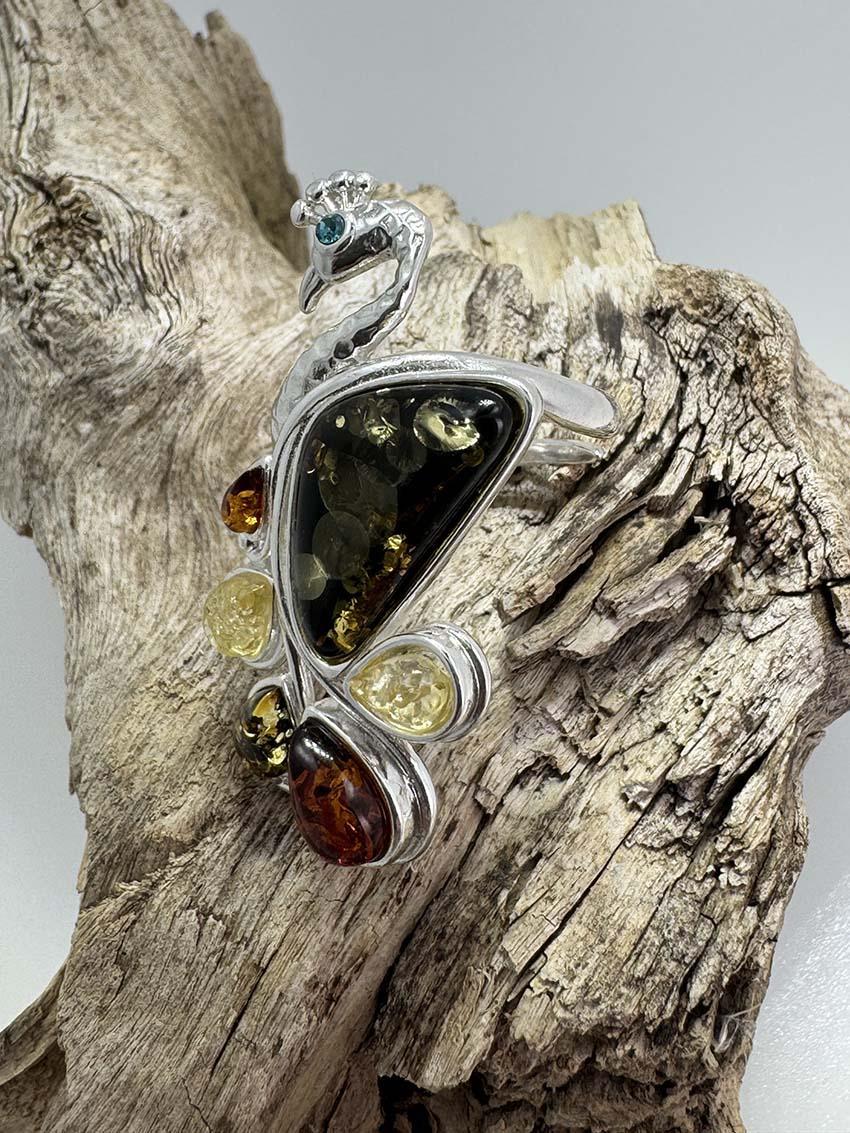
Natural Baltic amber jewelry features delicate organic resin set within handcrafted precious metals. Master jewelers throughout the Baltic Sea regions of Gdańsk and Vilnius have spent centuries perfecting settings that protect these ancient stones.
When polishing amber rings, earrings, brooches, necklaces, bracelets, and pendants, take care to safeguard the surrounding metalwork:
- Sterling Silver Bezels: Avoid rubbing silver-polishing creams or abrasive cloths directly onto the amber. Chemical tarnish removers contain strong acids that can etch soft organic resin.
- Gold Prongs and Filigree: When polishing intricate gold wire wraps or prongs, use cotton swabs dipped in cerium oxide paste to work precisely around the metal without loosening the mounting.
- Internal Inclusions and Sun Spangles: Natural Baltic amber frequently contains prehistoric plant debris, micro-bubbles, and disc-like stress features known as sun spangles. Always use light, even pressure to avoid stressing natural fracture planes.
For more information on the structural properties of fossilized resin, read our article on The Amber Truth: Unlocking the Secrets of Genuine Stones. You can also review professional restoration methods in this detailed guide on How to Repair Amber Jewelry [Pro Restoration Guide] - RapidRepair.blog.
Key Mistakes to Avoid: How to Polish Amber Jewelry Safely
Because amber is soft and chemically sensitive, common jewelry cleaning shortcuts can cause irreversible damage:
- Never Use Ultrasonic or Steam Cleaners: High-frequency ultrasonic vibrations create micro-cavitation bubbles that can instantly shatter natural internal fissures. Steam cleaners subject the resin to extreme thermal shock.
- Avoid High-Speed Rotary Buffing Wheels: Amber is a poor conductor of heat. High-speed motorized wheels create rapid, localized heat that can melt the surface, leave gouges, and cause static charge buildup that risks fracturing the piece.
- Keep Solvents and Perfumes Away: Alcohol, perfume sprays, hairsprays, and acetone dissolve fossilized resin, creating a chalky, sticky white film. Always put your jewelry on after applying cosmetics.
- Never Sand Dry: Sanding amber dry creates friction heat and airborne resin dust. Always use water or oil lubrication during sandpaper stages.
Maintenance Schedule: How to Polish Amber Jewelry to Maintain Radiance
To keep your handcrafted collection glowing, follow a simple, periodic maintenance schedule:
- After Every Wear: Wipe down your amber pendants, rings, and bracelets with a dry, untreated microfiber cloth to clear away skin oils and perfumes before storing.
- Every 6 to 12 Months: Perform a gentle conditioning treatment using a drop of olive oil and a soft flannel cloth.
- As Needed for Scratches: Reserve wet-sanding and compound polishing for moments when the gemstone shows visible scratches or cloudiness.
- Proper Storage: Store each piece of amber jewelry in an individual soft cloth pouch or lined jewelry box away from direct sunlight, heating vents, and hard gemstones.
To deepen your knowledge of Baltic amber care, consult our Amber Jewelry Expertise resource. You can also explore additional techniques in How To Polish Amber Jewelry Like A Pro - The Chic Tribe.
Frequently Asked Questions About Amber Care
Can you use household toothpaste to polish amber?
Yes, plain, non-gel white toothpaste can serve as a mild polishing compound if specialized products like cerium oxide are unavailable. Plain white toothpaste contains fine, calcium-based micro-abrasives that can polish light surface haze. Apply a pea-sized dab onto a damp microfiber cloth and rub the stone gently in small circles for two minutes, then rinse thoroughly with lukewarm water and dry. Avoid whitening, gel, or charcoal toothpastes, which contain aggressive abrasives and chemical additives that can scratch or discolor soft amber.
Why does machine buffing crack or haze amber gemstones?
Machine buffing wheels spin at high revolutions per minute, producing rapid friction heat upon contact. Because Baltic amber has exceptionally low thermal conductivity, this heat cannot dissipate across the stone. Instead, it concentrates directly at the contact point, causing the resin to soften, drag, melt, or develop thermal shock fractures. Additionally, extended dry friction against a motorized wheel generates static electricity in the resin, which can contribute to spontaneous cracking along natural internal fissures.
How do you fix white hazing or oxidation on amber?
White hazing typically occurs when amber comes into contact with alcohol, perfume, hand sanitizer, or household cleaning solvents, leaving a microscopically damaged, dissolved layer of resin. To repair this, lightly wet-sand the affected area using 2000-grit and 3000-grit waterproof sandpaper soaked in lukewarm water until the chalky layer is removed. Follow by buffing with cerium oxide paste on a microfiber cloth, then apply a drop of extra virgin olive oil to rehydrate the surface and restore clarity.
Conclusion
Genuine Baltic amber is a timeless link to ancient coastal forests, formed over forty million years ago and transformed into wearable art through centuries of Polish and Lithuanian artisan heritage. Because each handcrafted ring, necklace, bracelet, earring, pendant, and brooch is sculpted from natural fossilized resin, caring for it requires a mindful, gentle touch rather than harsh modern chemicals.
By using simple wet-sanding methods, natural oil conditioning, and soft hand buffing, you can easily protect the warm glow, rich honey tones, and natural inclusions of your jewelry for generations to come.
We invite you to explore our guide to amber jewelry to learn more about the fascinating history, natural origins, and handcrafted artistry behind authentic Baltic amber treasures.



Leave a comment
This site is protected by hCaptcha and the hCaptcha Privacy Policy and Terms of Service apply.